Activating Subscribers from the Inventory Page
Activating subscribers from the Inventory Page involves the following steps:
- Select the subscribers to activate.
- If required, assign nicknames and tags to the subscribers.
- Select the tariff to activate subscribers on.
- Inputting APN settings into your device
- Verifying the subscriber is online.
1 Select the Subscribers to Activate
To select the subscribers to activate:
- Navigate to the Inventory Page:
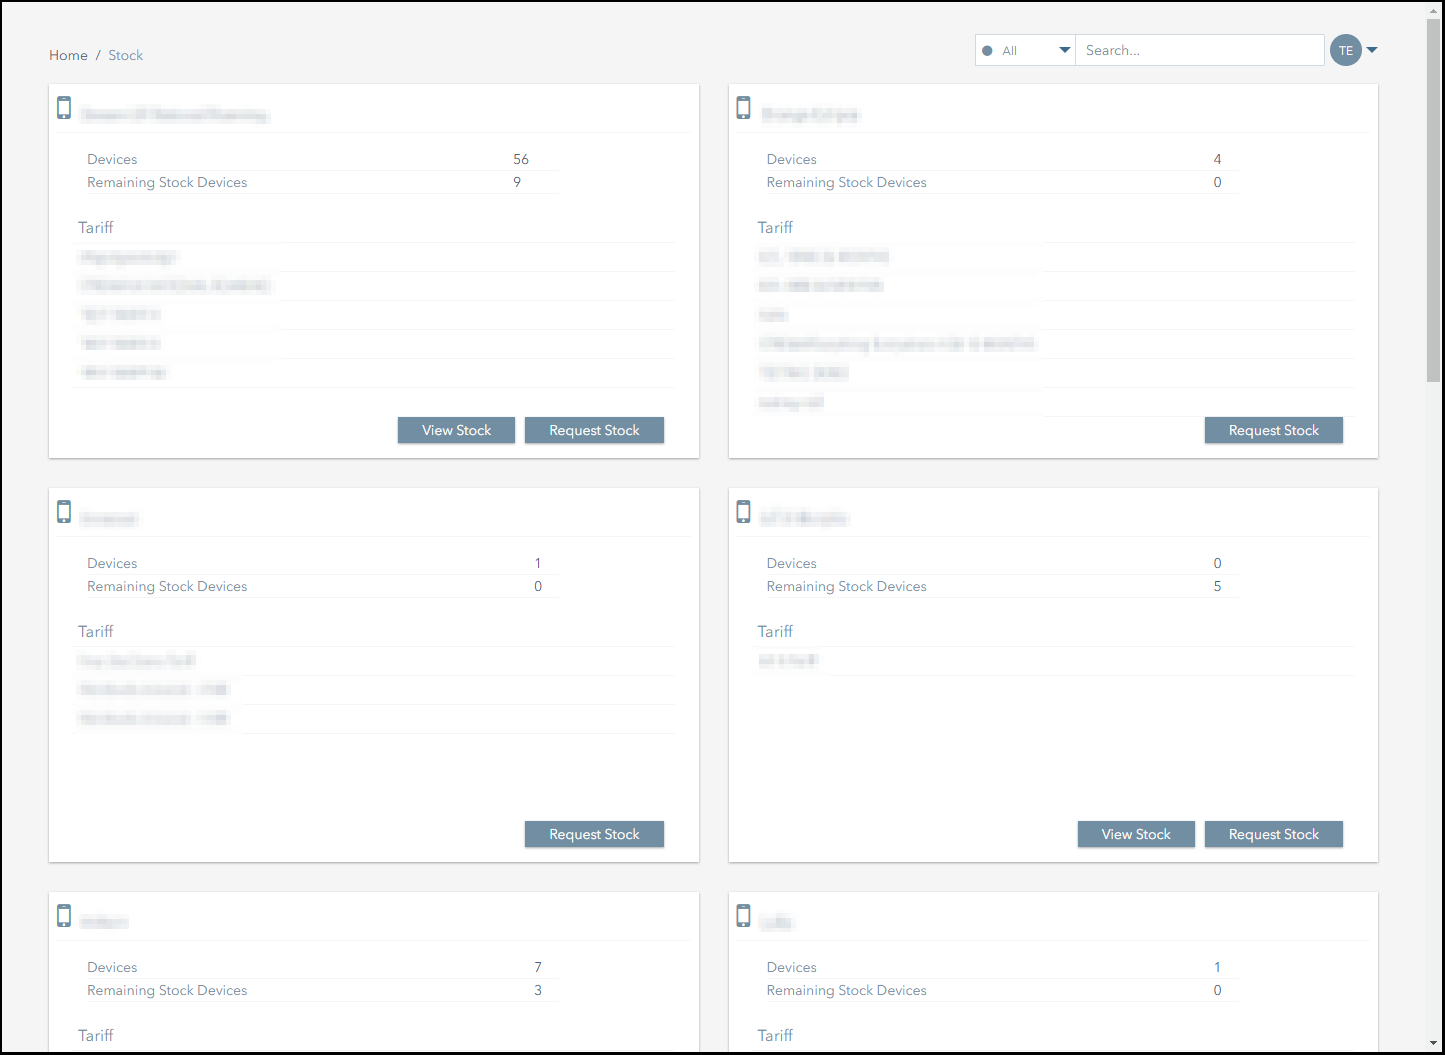
- Click on the View Stock button for the operator you want to activate subscribers from.
- Select the subscribers you want to activate from the Available Stock pop up.
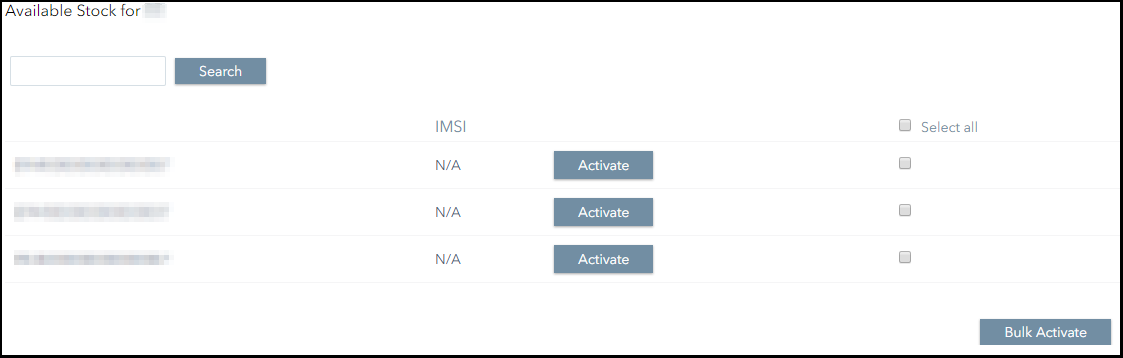
- If you are activating a single subscriber, click on its Activate button.
This will forward you to the Activations page. - If you are activating multiple subscribers:
- Click on check boxes for the subscribers you want to activate.
- Click on the Bulk Activate button.
This will forward you to the Activations page.
- If you want to activate all of the operator's subscribers:
- Click on the Select all checkbox.
- Click on the Bulk Activate button.
This will forward you to the Activations page.
2 Assign Nicknames and Tags
When performing activations, nicknames and tags can be assigned to subscribers from the Activate Page.
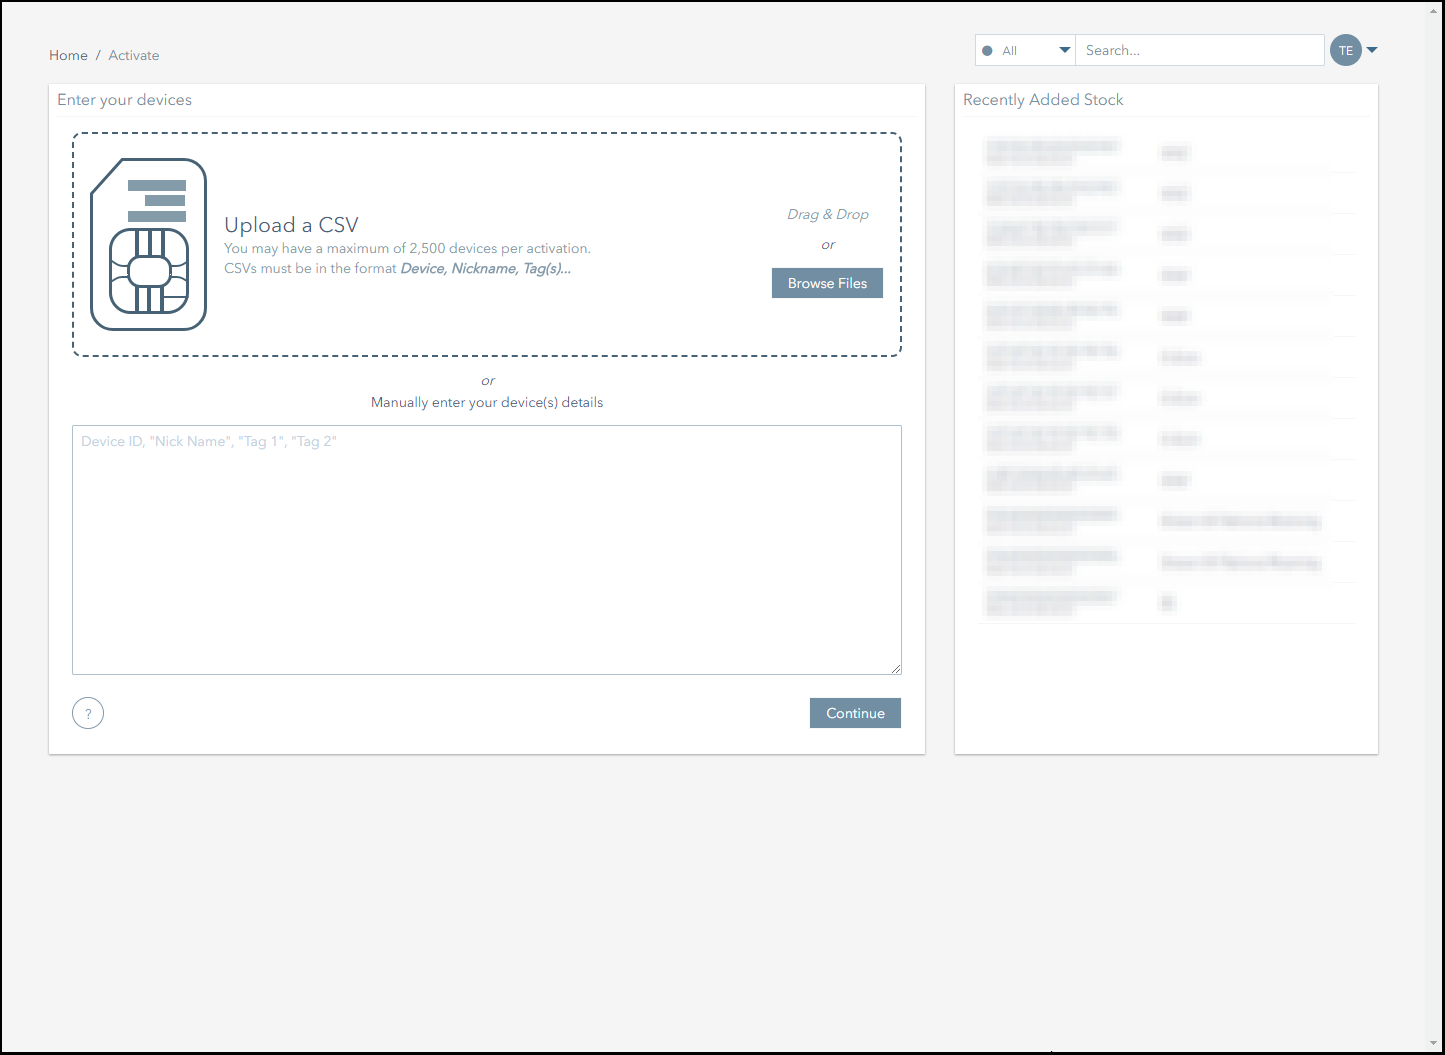
To add nicknames and tags to the subscribers you are activating:
- Refer to the Enter your devices panel on the Activate Page.
- If you want to add nicknames or tags to the subscribers you are activating, update the information in the text box to include them.
This information must be in the format Device Identifier, Nickname, Tag(s). - Click on the Continue button to start configuring your subscribers for activation.
3 Select Tariff
You select a subscriber's tariff using the Configure your devices panel.
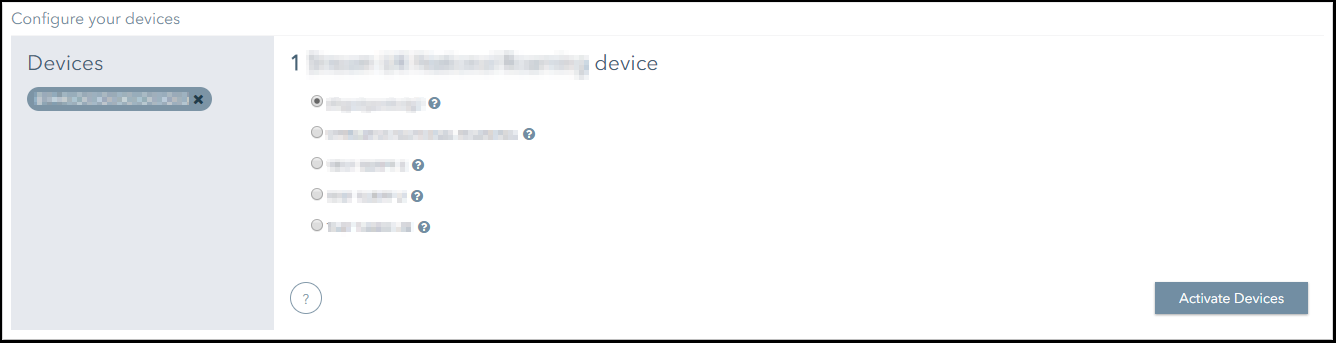
To select a subscriber's tariff:
- From the Configure your devices panel, select the tariff that you want to activate the subscriber on.
- If you are activating an Iridium subscriber, you can configure an endpoint to which its data will be forwarded:
- Click on the + button.
- From the drop-down menu, select the type of endpoint you want to forward data on to.
Data can either be forwarded to an email address or a TCP address. - In the text box, enter the email or TCP address that you want data to be forwarded to.
- Click on the Activate Devices button to complete the activation process.
4 Inputting APN Settings
After activating your subscribers using the platform, the next step towards getting them online is to configure your devices to connect to our network.
To achieve this, your devices need to be configured with the correct Access Point Name (APN) settings. These settings give the device the information it needs to establish a data connection on our network.
- While the device is turned off, insert the SIM into the device, and then turn it on.
- Input the APN for the network you are connecting to. This will have been provided during onboarding.
- If the subscriber uses a fixed-IP address, enter the following settings:
- Username: default
- Password: void
- If the subscriber uses a dynamic IP address, enter the following settings:
- Username: streamip
- Password: streamip
5 Verifying the Subscriber is Online
You can now verify whether the subscriber is online, using the Connectivity Management platform.
- Navigate to the subscriber management page for the subscriber you want to check is online.
This can be achieved by searching for the subscriber's ICCID or MSISDN using the Search Bar, for example.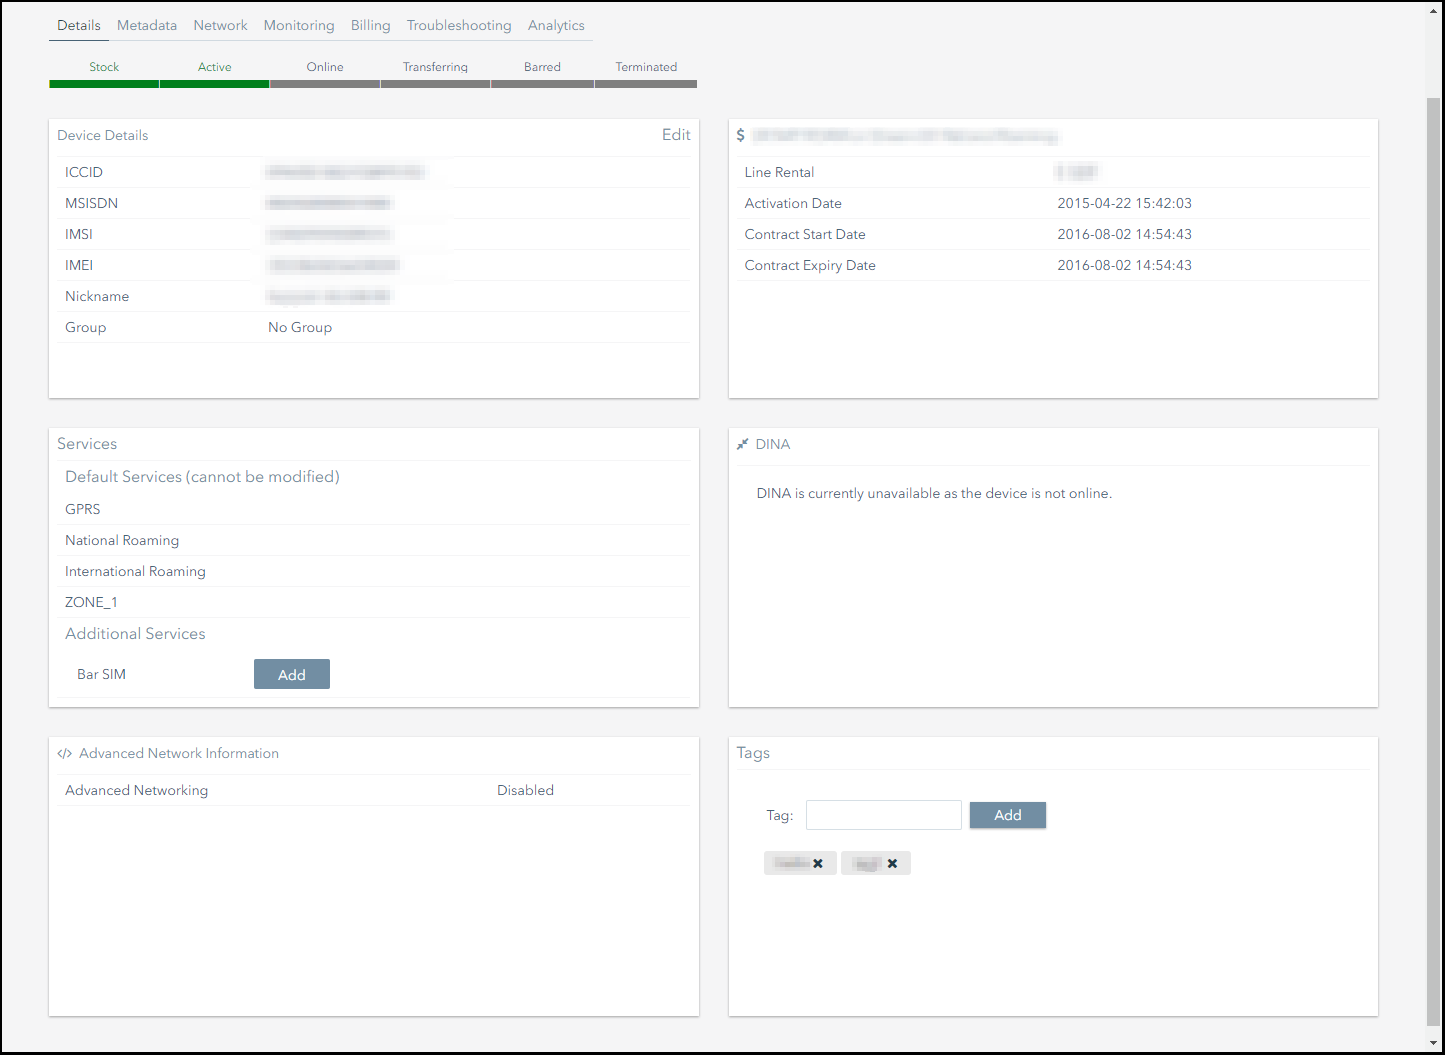
- Refer to the subscriber's status.
- If the subscriber has connected successfully, the platform displays its status as Online.
On This Page
Pelion
Ground and First Floor
St. Vincent Plaza
319 St. Vincent Street
Glasgow, G2 5LD
Ground and First Floor
St. Vincent Plaza
319 St. Vincent Street
Glasgow, G2 5LD